Visual Basic information is for the sake of interest only. Students are not expected to learn coding in Visual Basic. It is above and beyond course content, though students are welcome to use it. This is a quick guide to help you navigate through an animation project.
Visual Studio 2019
|
|
Visual Basic is a programming language inside of the programming environment known as Visual Studio 2019. It should already be installed on the laptops, but there may be some difficulty getting into it for the first time.
|
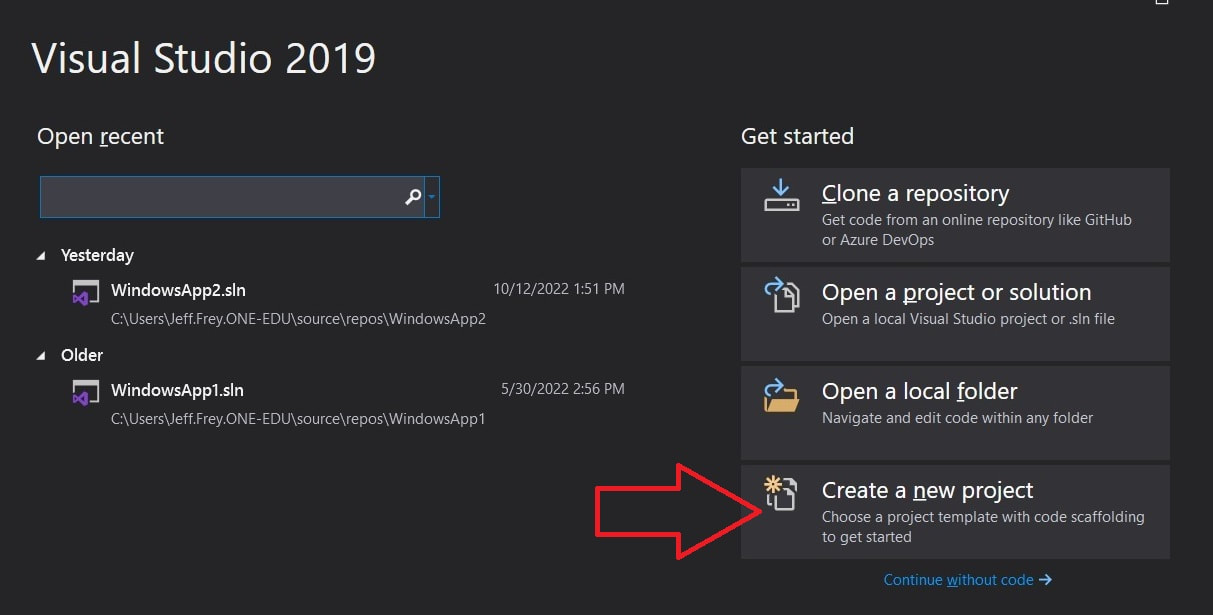
New Project
|
If this is your first time using Visual Studio on this computer, then you will likely need to create a new project (left).
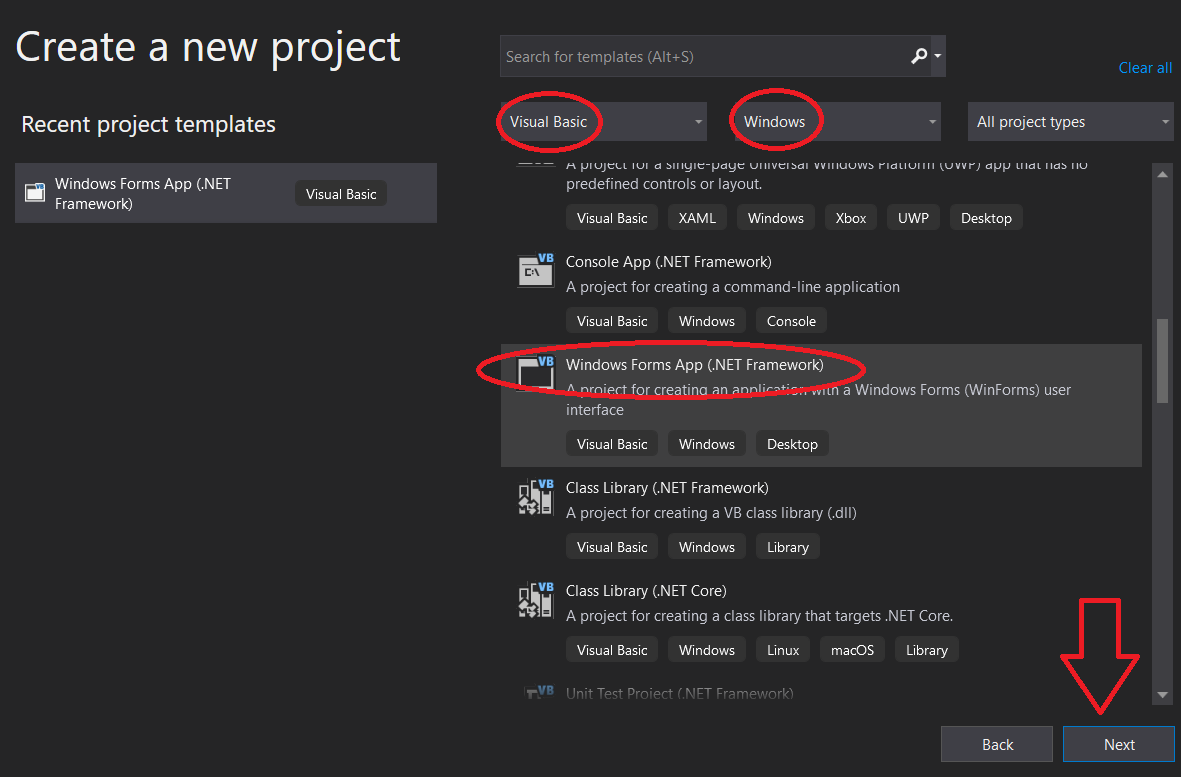
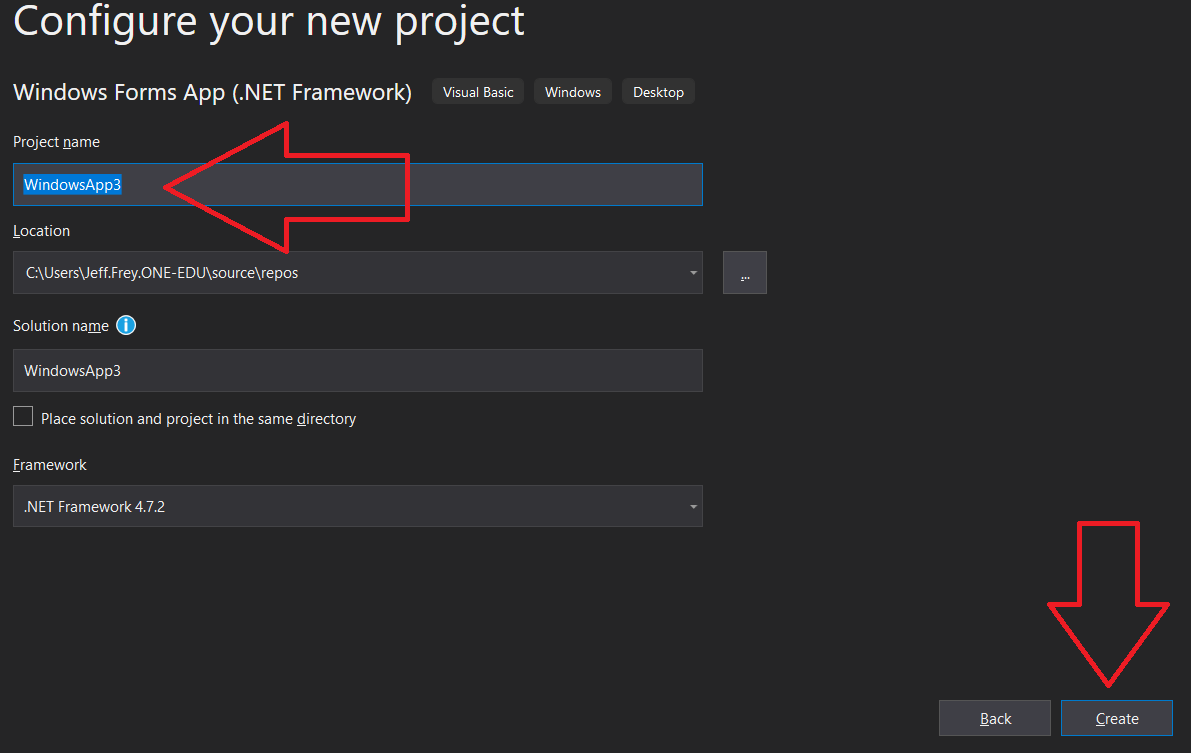
When creating a new project, you will want to set the language to Visual Basic, set the platform to Windows, and then scroll down in the list to select Windows Forms App. Then you need to give the project an appropriate name. |
|
Navigating Visual Studio
Once you have created your project, you will end up in what is known as the IDE - a place where you begin to create your program. To run the program, hit the start button at the top. Don't expect to see much at the beginning until you add in controls and code it.
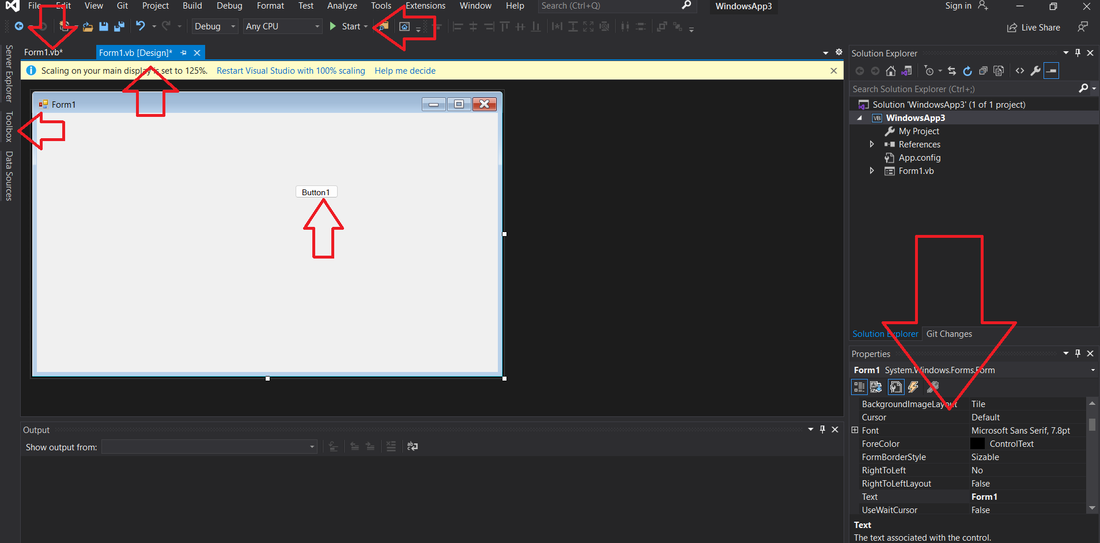
In the top left corner will be two tabs for selecting between form design view where you drag buttons onto the form, and the coding view where you write program code.
|
The large bright window in the middle is the "form" that you place your objects in to display. The toolbox on the left is where you get the controls to place on the form. The window in the bottom right corner is the properties window which tells you information about each control on the form. The properties window holds all important information about it, such as the location of a button, what text is written on the button, what colours are on the button, etc. |
Properties for Animation
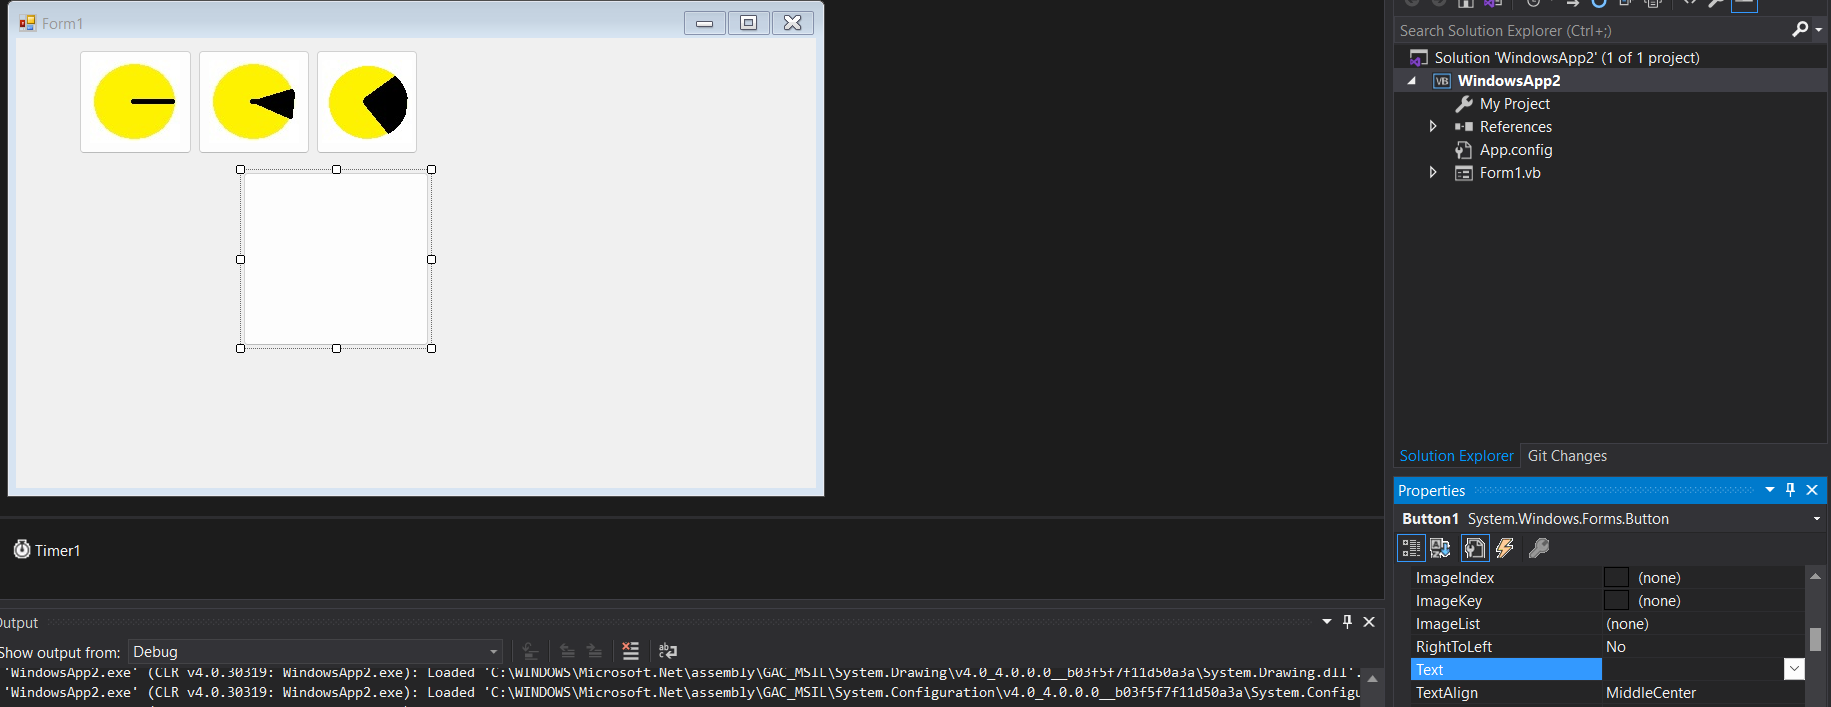
For the example animation, I added 4 buttons to the form. The biggest button is button1 and is going to be used to hold the animation. Notice that I made the "text" property of that button blank.
The other three buttons have the individual pictures or "frames" for the animation. To put a picture onto a button, you click on the "image" property in the bottom right.
The other three buttons have the individual pictures or "frames" for the animation. To put a picture onto a button, you click on the "image" property in the bottom right.
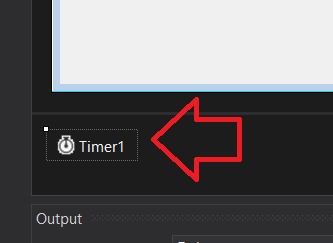
Less obvious is the Timer control that is added at the bottom. Though most controls are found in the Toolbox under "common controls", the timer is actually in the toolbox under Components. This is what allows the clock to tick, thus flip through the animation sequence.
|
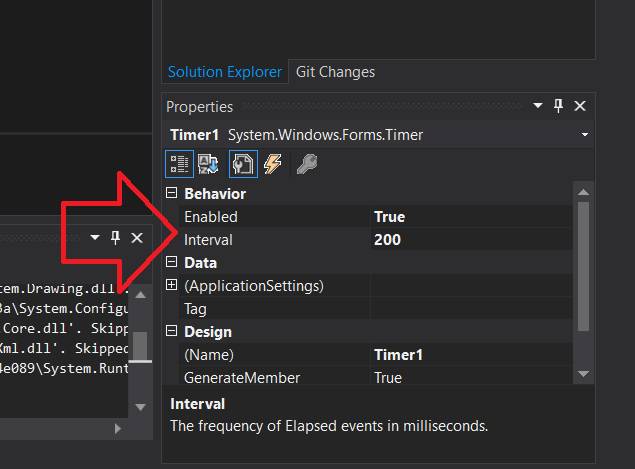
Once the timer is added to your project, you need to set its properties. Click once on the timer icon, and then adjust the properties of it.
You need to set the enabled to be TRUE. You will also likely want to adjust the milliseconds of the ticking interval. |
|
Coding Animation
If you have successfully added the buttons and timer, and adjusted their properties as above, then you are ready to begin programming. To get to the coding window, double click on any control in your form (your code is going to be inside the timer function, so double-click on your timer).
|
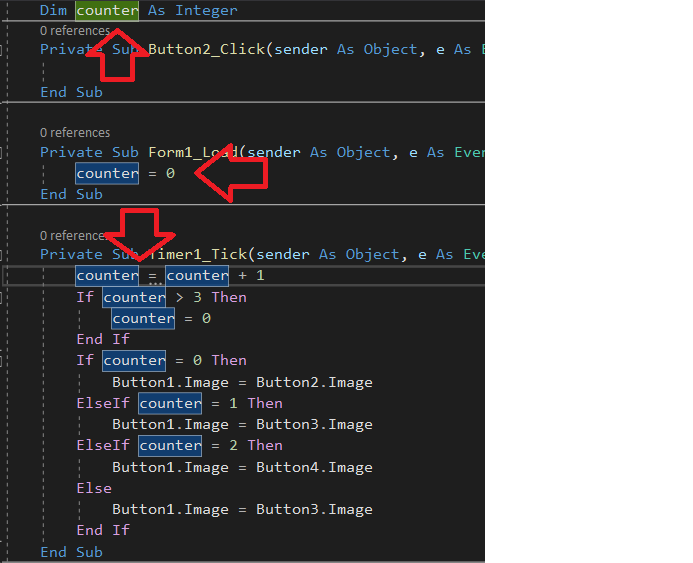
Step 1: create an integer variable at the top named "counter". This is going to be used to keep track of the number of clock ticks.
Step 2: inside of the Form_Load (this is the equivalent of the On Start program in TinkerCAD - it runs only once at the very beginning) we make sure that the counter starts at zero. Step 3: Inside the Timer_Tick function (which runs every time that the clock ticks) we write several lines of code. First, we increase the value of counter by 1. We only want to count 4 times before resetting the clock back to zero, so we ask IF the counter is greater than 3. Now that we know the value of counter is between 0 and 3, we can ask about its specific value and make the image of our animation button (Button1.Image) equal to the image stored on one of the other buttons (Button2.Image) |
